

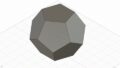
今回は切頂20面体を作成します。
まあ、正確には正多面体ではないんですが。
↓元ネタ。
大まかな進め方は前回やった↓と同じです。

まず底面のスケッチを書きます。

繋がる面の、底面の頂点からつながる辺の角度を割ださないといけないのですが、今回は周囲が6角形のため青破線の一辺の長さは5角形の辺の2倍なので簡単です。


傾きを割り出して、

2つのエッジを通過する平面を利用してスケッチを作成し、6角形を書き、中心に軸を作成します。


スケッチはこれで終了で、サーフェイスを作っていきます。
まずスケッチが終わっている2枚を生成して、

6角Z軸を中心に円形状配置でコピーします。

次に底面の5角形を、6角形の中心に作った軸を使って数量3を指定しチェックボックスを使って1枚だけコピーします。

そして作成した一枚をZ軸を中心に数量5でコピー。

次は軸の有る6角形の隣の6角形を指定し、6角形の中心軸を使って数量3で一枚だけコピー。

そしてそZ軸を中心に数量5でコピー。

次は軸の有る6角形から一つ離れた6角形を選択して6角形の軸を使って数量3で1枚だけコピー。


次はこんな感じで5角形と六角形を一組にして、6角形の軸を使って数量3で1組のみコピー。

その1組をZ軸中心に数量5でコピーし、

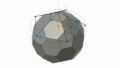
頂上の5角形をパッチで埋めて、

全てのボディを選択してステッチすれば完成です。


切頂20面体の作り方はもう一つ思いついたので次回書きます。


コメントを投稿するにはログインしてください。